Tag Archives: design

Upholstery Class: Week One.

25 Sep

chair-8

After wanting to take an upholstery class for a while, I finally was able to get in and sign up before all of the spots were filled in this 9 person learning experience. I also purchased a spot for my husband, as he is also interested in learning how to restore furniture appropriately. 

I found this chair on Craigslist for $48 and it was exactly what I had in mind. It was an antique and had character in its bones, which I suppose were my only criteria. Upon starting  to take this apart, tack by tack by tack, it became clear that this chair had originally been crafted with great care. The instructor noticed this as well, and commented on the hand sewn details of the interior, the hog hair filling, the burlap crown on the inside of the cushion filled with more hog hair, and the different sized tacks used for differing details.

chair-9

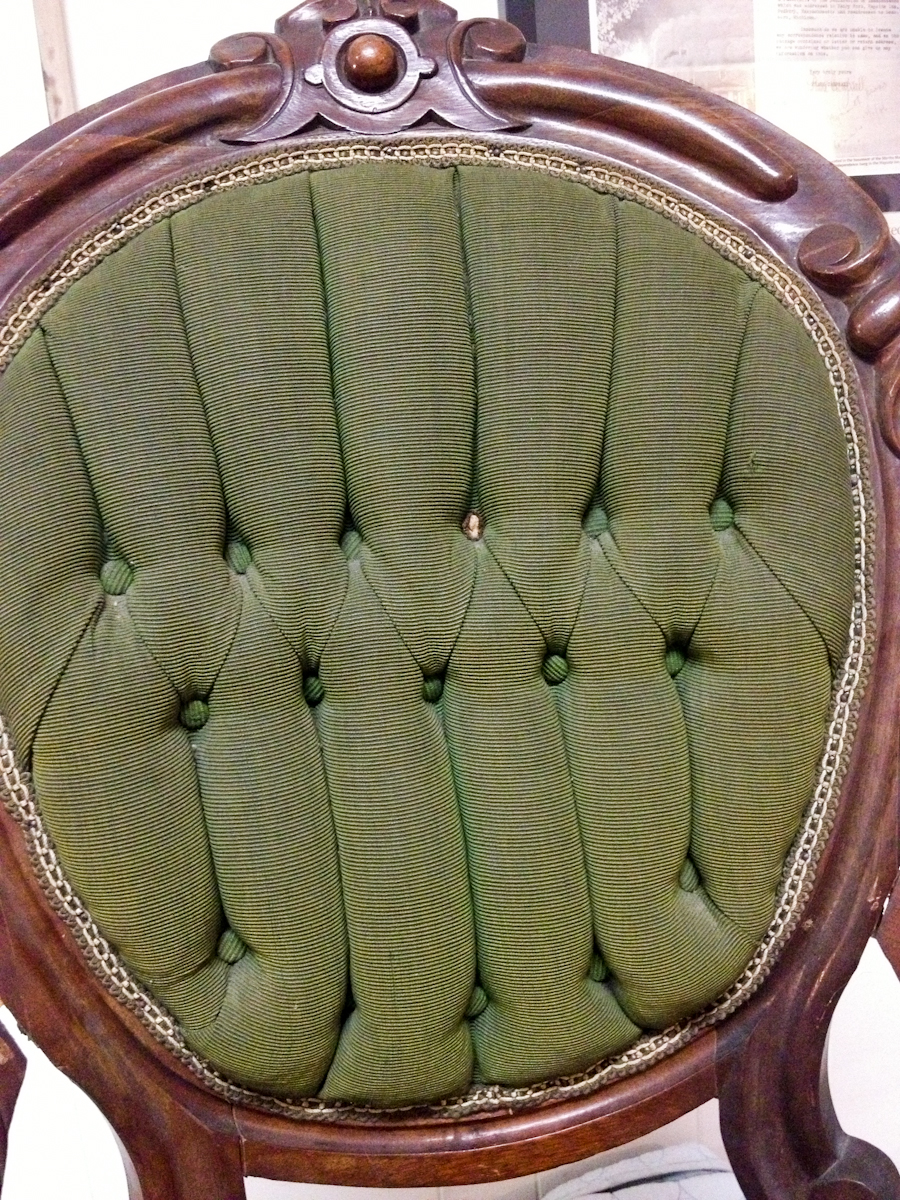
Another interesting part which I loved about the chair, as did the instructors, was the backrest of the chair. The fabric had been sewn, tacked and held in place with handmade buttons in an intricate way which would have taken great skill and talent to accomplish. It may not show in the photo below, but it is quite impressive in the flesh (fabric?).

chair-4

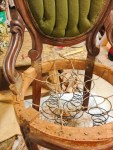
The underside of the chair was dusty and dried out, and was easy to take apart. With each tear and pull, more dust floated out and I was able to get a clearer view of the springs.


By the end of the three hour class, I had removed EVERY tack, which was one of the most meditative and relaxing things I have done in a long while. There was something so satisfying about pulling and picking out each individual spike. The only thing left intact is the fabric and hog hair on the front of the backrest. This is to preserve the uniqueness of the chair, and replicate it when reupholstering it.

I will update my progress here as the weeks go on. Now to decide on a fabric….

Stitch by KMIDesign – Cambridge, MA

9 Sep

Here’s a post about one of my favorite Massachusetts designers Kate Maloney Interiors (written/photographed by my favorite person!). Check out Kate’s storefront, Stitch, in Cambridge, Ma and see all of the uniquely awesome items she’s picked up to pass on to you!

Joe And Sometimes (y)

Image

Ever look at a shelter magazine or blog and see spaces that look frigid and sterile? You sit and wonder, “Does someone actually live there? Ok, clearly these people don’t have kids or pets or personalities.”  Well if that is your impression of what high-end interior design looks like, look again.

Cambridge based Kate Maloney Interiors creates gorgeous spaces that are meant to be lived in by the whole family.  Kate and her team infuse each project with a quirky mix of pattern, color and texture.  Though usually not one for labels,  Kate’s style could possibly be coined as, “Cantabridgian Chic” or perhaps “Boho Modern.” Whatever the label you come up with, each home is always a great balance of the old and new; creating spaces that are timeless, stylish and always functional.

Established in 2003, Kate’s design office recently expanded to include a new retail venture called Stitch. “After…

View original post 167 more words

Radio Flyer Herb Garden.

9 May

I found this old Radio Flyer wagon while driving down the street one day. Someone had put it out with the weekly trash to be picked up and destroyed. I couldn’t have that. I love old things too much, and my car had plenty of room to fit it.

The wagon has sat in my basement for a good three years, holding random boxes of tools and supplies in the workroom. However, this weekend while in New Hampshire I found a great little nursery with tons of annuals, perennials, vegetables and herbs. Each pot of herbs and veggies only cost $2.99. I couldn’t resist buying some.

Last year I had a couple of potted herbs sitting on the patio. This year, I now have a few more to add. I wanted them in one central location, out of the way, but easy to access for cooking. I saw the old wagon in the basement and decided it would be repurposed as the home of the herb garden.

It’s in a spot that gets a decent amount of sun, but with the wagon, I can easily move it to other parts of the patio if I think the herbs could benefit from even more sun. Once the herbs start to really grow, they should fill the wagon in nicely.

What did I plant?

  • Basil (a must-have for any garden)
  • Cilantro (for taco night and guacamole)
  • Pineapple Mint (for Mojitos to accompany whatever I use cilantro for)
  • Oregano (basic herb, but great fresh flavor)
  • Lavender (for cookies, butter, homemade cleaning products, etc)
  • Thyme (This survived the mild winter we had and never really lost leaves from last year’s growing season)

I ended up placing an extra solar yard light I had into one of the potted herb plants. It will add a little more to the evening atmosphere of the yard and patio. I also had some room to place a small watering can in the wagon as well, so that I can use the rain water it captures to hydrate the plants when they need it. Another thing to note…I drilled a few holes into the bottom of the wagon to drain any excess rain water. This will prevent your herbs from being overwatered if there are holes in the bottom of the pots that are used.

And I also was able to finally fill the raised garden bed I built last year (Post: How To Build A Raised Garden Bed). I’m looking forward to filling that with vegetables and updating their progress here.

Roller Derby #10

7 Mar

Here’s an old photo of an old skateboard I took about two years ago. I really love the color of the board and the worn out nature of the wood.

It sat here on display in my dining room for quite some time, and now resides in the same room, but in a different location.

Letterpress Weekend Course: Day 2

26 Feb

Today was the second and final day of my weekend letterpress course. Remember how much in love with it I was yesterday? I still feel that way. And will definitely be investing in one of these machines (albeit most likely a much smaller one) in the not too distant future.

The machine we used today to print our designs was a Chandler and Price machine manufactured in 1902. It uses nothing but the power of your own arms and legs. It’s a workout and a creative design session all in one.

The creative part came to me a little too late however. I had no idea what to make. I was over-thinking it all weekend to the point where my mind could not decide on anything. Business cards? Greeting cards? Coasters? As I was gathering materials this morning, I still had no clue. Joe(y) had suggested I make recipe cards, so that’s what I did, sort of.

I made the design. It was a half-postcard half-recipe card hybrid, apparently. I enjoyed having to put everything in reverse. Where the top is at the bottom and the left is on the right. It fits in with my day job quite well as I view reversed images all day long. My brain easily adjusted to this part.

Next, I set the locked frame into the machine and applied the ink color that I had mixed together.

Once the machine had been set and inked, the actual printing process was quite speedy. I realized I probably should have made my form a bit smaller, and not the exact measurements of the size paper I would be using. I know better than that. I just wasn’t thinking.

In turn, I lost one of the lines I set in the process in order to be sure everything else fit it.

While I am not quite sure what exactly I made today, I love that I made something and understand how it all works now.

I have been wanting to learn this craft for a long time now, and have finally done just that. I’ll most likely be going back for open studio time in the near future, this time with an actual design and project in place.

Letterpress Weekend Course: Day 1

25 Feb

Today was the first of my two day crash course on learning how to set and operate a letterpress machine and type. I am incredibly in love.

I have wanted to take a course like this for several years now. I was always either too busy with actual classes that lead to a degree or I would have just missed a deadline whenever the idea popped back into my mind. This year, however, I was determined.

I found the course being offered at a local art school – Montserrat College of Art – and eagerly awaited registering and paying as soon as I could.

Today we learned the basics. How to set type correctly, how to use the machines, how to care for all the materials, techniques, etc. Our instructor was very friendly and insanely knowledgeable about all things letterpress – as well as lots of other things too!

The group of six in the class we all given a topic and asked to set type based on the theme. Our instructor showed us one from a previous class for which the topic was “food”. I wished that was today’s topic (If you’re new to this here blog, just take a look around, you’ll see why). Instead, we got “Myths”. Fine. I’ll work with it.

After setting my type (see the above pic – I apologize for the quality, I didn’t think to bring my actual camera today) we all then put our random thoughts and ideas regarding myths together. The press we used for this project was a Vanderbilt 219.

The final result:

I did the last line “SHE SANG THEM to THEIR DEATHS”. For some reason the only myth I could remember for the life of me was that of the Sirens in Greek mythology. I was super excited to have found little lobsters though. I love lobster.

Tomorrow I’m not sure what I’ll make. Most likely I’ll make some cards to send out. We’ll see what I come up with I guess…